Last month I released a tutorial for automating new image optimization over FTP. This time we’re going to crawl an entire website and locally optimize the images we come across, organized by URL.
Note this short but intermediate level script is not for massive sites as it is. For one thing, all images are dumped into a single folder. It would not be difficult to create a new folder for every page, but even then, you may have an unmanageable number of folders. Unoptimized images continue to be a big culprit for not passing web core vitals. Let’s dive in!
Table of Contents
Requirements and Assumptions
- Python 3 is installed and basic Python syntax understood
- Access to a Linux installation (I recommend Ubuntu) or Google Colab or Google Cloud Platform (some alliterations will need to be made)
Install Modules
Before we begin, remember to watch the indents of anything you copy here as sometimes the code snippets don’t copy perfectly. All of the modules below should be in core Python 3. I found I needed to update PIL to the latest version 8.2, you can do that via this command in your terminal (if using Google Colab, put an exclamation mark at the beginning):
pip3 install PIL --upgrade
Also, we need to install Elias Dabbas‘s advertools module
pip3 install advertools
- advertools: handles the crawling using scrapy
- pandas: helps with normalizing the crawl data
- os: for making the image directories
- requests: for downloading the images
- PIL: processes the image compression
- shutil: handles saving the image locally
Import Python Modules
Let’s first import the modules needed for this script expressed above.
import advertools as adv
import pandas as pd
import os
import requests # to get image from the web
import shutil # to save it locally
from PIL import Image
import PIL
Start Web Crawl
The first thing we need we need to do is define the starting URL for the web crawl. 99% of the time this should be your homepage. Then we run the adv.crawl() function in advertools and save the output as crawl.jl and that then gets loaded into the crawlme dataframe. This process may take a couple of minutes depending on how large your site is. I would not recommend this script on very large sites with more than tens of thousands of page or images. In general, the crawler is very quick and processed this blog in just several seconds. Also, be aware some sites using Cloudflare or other firewalls may end up being blocked at some point.
site_url = 'https://importsem.com'
adv.crawl(site_url, 'crawl.jl', follow_links=True)
crawlme = pd.read_json('crawl.jl', lines=True)
Normalize and Prune Crawl Data
With our dataframe we can start normalizing and pruning the data to only what we need. Often there are many nan and blank values so we drop those rows.
crawlme.dropna(how='all')
crawlme.drop(crawlme[crawlme['canonical'] == 'nan'].index, inplace = True)
crawlme.drop(crawlme[crawlme['img_src'] == ''].index, inplace = True)
crawlme.reset_index(inplace = True)
The crawlme dataframe contains a lot of crawl data. For our purposes, we only need the canonical and img_src columns. We select those columns and convert them into a dictionary object.
url_images = crawlme[['canonical','img_src']].to_dict()
Next we setup a counter to help iterate through the image keys and a list variable named dupes to store the URLs of images we’ve already processed so we don’t process them again.
x = 0
dupes = []
Create Output Folders
Now we look to create two folders. One to store the original files in case you need to restore them and another folder to store the optimized images. If these folders already exist, it simply sends the paths into the variables.
try:
  path = os.getcwd() + "/images/"
  optpath = os.getcwd() + "/images_opt/"
  os.mkdir(path)
  os.mkdir(optpath)
except:
  path = os.getcwd() + "/images/"
  optpath = os.getcwd() + "/images_opt/"
Process URLs for Images
Now it’s time to process the URLs. We loop through the URLs in the canonical key. Then we match it with the img_src key using the counter variable. The images for each URL are separated with “@@”. So we split the img_src string by ‘@@’ which turns into a list.
for key in url_images['canonical'].items():
  print(key[1])
  images = url_images['img_src'][x].split('@@')
Before we process the img_src list for the URL we want to preload the homepage’s image URLs into the dupe list.
  if x == 0:
    dupes = images
Process Images
Now we process each image as long as it isn’t listed in the dupes list. This ensures we aren’t processing the same images over and over. A common occurrence for that is design framework imagery and logos which would be found on every page. These will be processed on the first URL they are found and then not again. We grab the image file name by splitting the string by backslash and then selecting the last list item that was created which will be the filename. Using requests module we then download and decode the file.
  for i in images:
    if i not in dupes or x == 0:
      filename = i.split("/")[-1]
      r = requests.get(i, stream = True)
      r.raw.decode_content = True
If the image download was successful we save the file to the folder we set earlier.
      if r.status_code == 200:
        with open(path + filename,'wb') as f:
          shutil.copyfileobj(r.raw, f)
Optimize Images
Once the image is downloaded into the original image folder, we open it locally and process it with the PIL module and save the optimized output in the optimized image folder we set earlier. Play around with the quality parameter. 65 I usually safe, but you may be able to get it lower or need to raise it if you see image degradation. You also have the option to resize the image if you desire. Simply use the Image.resize() function of PIL. Documentation is here.
      picture = Image.open(path + filename)
      picture.save(optpath + filename, optimize=True, quality=65)

      print('Image successfully downloaded and optimized: ',filename)
   else:
      print('Download Failed')
After all the images for the URL are processed we compare any URLs we processed to what is contained in our dupes list. If a URL is not in the dupes list, it is added, so we don’t process it again if found on another URL.
  if x != 0:
    [dupes.append(z) for z in images if z not in dupes]
Last we output the counter for process tracking and increase the counter by 1. Then the first URL loop starts again and the next URL is processed
  print(x)
  x += 1
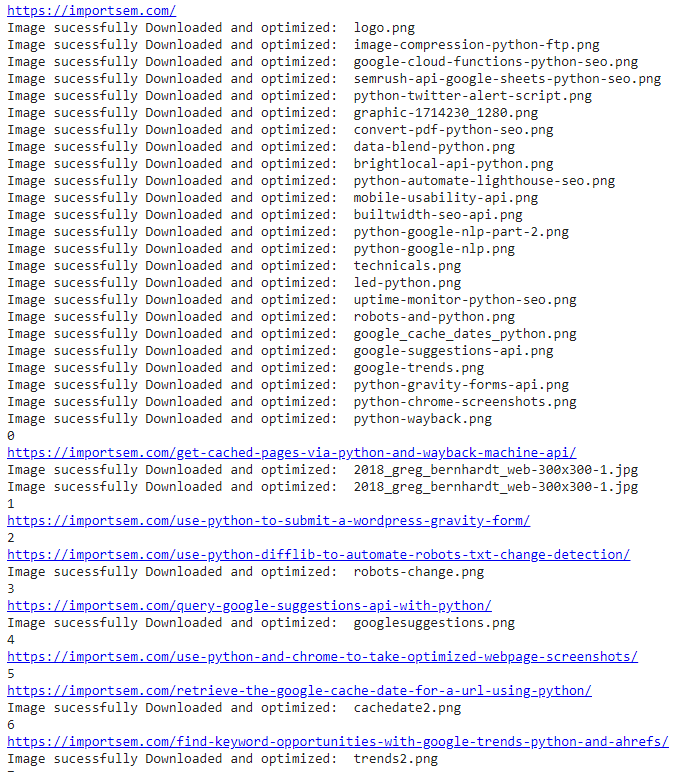
Example Output

Conclusion
With this, you now have the ability to crawl and optimize files for any website very quickly. If you have a very large site you at least have the framework needed to build something a bit more robust. Now get out there and try it out! Follow me on Twitter and let me know your applications and ideas! Special thanks to John Murch for this tutorial idea!
Python Image Optimization FAQ
How can I crawl and optimize all website images using Python?
Python scripts can be employed to crawl a website, extract image URLs, download the images, and then optimize them using image processing libraries such as Pillow.
What Python libraries are commonly used for crawling websites and optimizing images?
The requests library is commonly used for web crawling in Python. For image optimization, the Pillow library provides tools to resize, compress, and enhance images.
What specific steps are involved in crawling and optimizing all website images with Python?
The process involves crawling the website to gather image URLs, downloading the images, and applying optimization techniques such as resizing and compression using Pillow. This sequence of actions is encapsulated in a script for automation.
Are there any considerations or limitations when crawling and optimizing website images with Python?
Consider factors such as website permissions, ethical web scraping practices, and potential variations in image formats and resolutions. Ensure compliance with the website’s terms of service.
Where can I find examples and documentation for crawling and optimizing website images with Python?
Explore online tutorials, documentation for requests and Pillow libraries, and Python resources for practical examples and detailed guides on crawling websites and optimizing images using Python.
- Build a Custom Named Entity Visualizer with Google NLP - June 19, 2024
- Storing CrUX CWV Data for URLs Using Python for SEOs - January 20, 2024
- Scraping YouTube Video Page Metadata with Python for SEO - January 4, 2024


